#mutualaid
DIY Emergency Tyvek Shelter ‘zine instructions

DIY Emergency Tyvek Shelter – v 1.0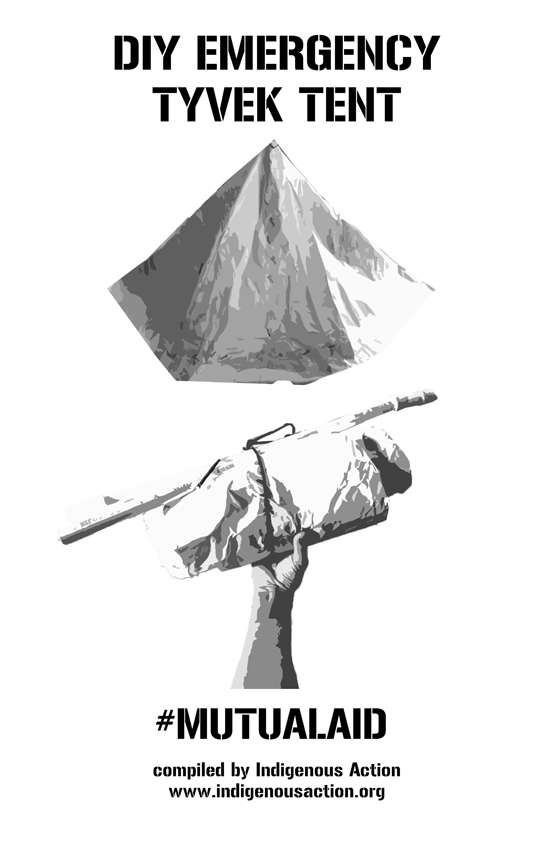
compiled by Indigenous Action
www.indigenousaction.org
PRINTABLE PDF (6.2 MB)
READABLE PDF (6MB)
Check out our emergency handwashing station ‘zine here: www.indigenousaction.org/diy-emergency-handwashing-station-instructions-zine/
This is a quick set-up shelter that is weather proof and extremely lightweight (about 1lb 5 ounces without pole & stakes). While there are several designs for Tyvek shelters, we found most of them unclear and too complicated for our needs.
We’ve designed this for one person and their gear but this can accommodate two tall people comfortably. This tent can either be pitched with a single pole or secured with a line to give more interior space. This no-sew design was made to have as minimal waste material leftover and costs less than $15 to make depending on how resourceful you are. This design uses tyvek which is weather proof and very strong and light, it is also permeable so it can “breathe.” This material can be found at construction sites and other places, be resourceful and creative! Most supplies listed can be donated, scavenged, or liberated.
We offer this ‘zine in the midst of the COVID-19 pandemic in the Fall of 2020 while many of our unsheltered relatives have continued to be neglected by callous politicians who had no plans to ensure the wellbeing of our relatives.
Please replicate and improve/modify this design and ask unsheltered folx what would be most useful to them. Let’s take care of each other. Capitalism is pandemic. Colonialism is a plague. Sleep is not a crime, shelter is a basic human need.Time: (30min+)
Materials:
– 9’ x 10’ piece of tyvek
– 6‘ x 4” piece of tyvek (for tent loops)
– 10’ of paracord (or any strong yet small cord)
– tyvek or duct tape
– 1” sticky back/self adhesive velcro (about 74” of both hook and loops)
– adhesive spray (we recommend 3M Super 77)
– 44” PVC pipe (1/2” schedule 40)
– 1/2” PVC pipe cap (x2)
– 1/2” PVC pipe coupler
– 5 tent stakes
Tools:
– scissors
– measuring tape
– permanent marker
– lighter
– spring clamp
– saw (for PVC)
Instructions:
Tent pole:
1. Cut 44” of PVC pipe in half.
2. Fit caps to each end and then connect with the coupler. No need to glue anything together. The pole should measure 46” length when fitted together.
3. Cut one inch of velcro and place the “hook” side on the bottom of one of the end caps (doesn’t matter which side). Set the “loop” section aside.
Tent loops:
1. Cut a 4” section wide of tyvek about 6’ in length. You can use scraps for this too.
2. Cut those sections down to 12” so you have 6 pieces.
3. Fold one piece of tyvek strip in half and use spray adhesive to bond together. Repeat for the rest of the strips.
4. Cut six 12” sections of paracord.
5. Make a small loop about 1 1/2” in diameter with the paracord and tie it off with a knot. Use the lighter to melt the ends of the paracord so they do not fray (careful it’s sticky and very hot!)
6. Pull one of tyvek strips through one of the paracord loops and fold the tyvek in half. Repeat the process for the remaining tent loops and set aside.
Tent:
1. Cut tyvek sheet to 9’ x 10’.
2. Fold the sheet in half along the 10’ side so you have a 9’ x 5’ section. Crease the fold. The part of the fold that is open will be considered the “front” while the folded crease will be considered the “back.” Fold 5.5” of the bottom front piece of tyvek over itself to make a bottom flap.
3. With the permanent marker place a mark at the center of the bottom of the folded over piece of tyvek which is the 9’ section at about an inch from the edge of the front and another mark about an inch from the edge on the back on the top folded piece. Place one more mark on the top section of the front of the folded over piece about two inches from the edge.
4. Unfold the tyvek sheet.
5. Still working on the bottom piece of tyvek, measure 19” inches to the left of the center mark on the front and mark another 19” from the right side of the center mark. This will be for the door opening.
6. Take the left corner of the front BOTTOM PIECE ONLY and fold it to the left 19” mark. Do the same to the right side and crease them both.
7. Mark 5.5 inches from the crease of the left fold and cut that section off. Do the same for the right side. You will end up with two triangles, set them aside as we will use these for the door. The excess 5.5 inches will be considered the “flap.”
8. Fold the tyvek sheet in half again.
9. Use the spray adhesive to bond the bottom left side flap to the inside of the upper section of the tent. Do the same for the bottom right side. Let the adhesive dry (you can use some tyvek or duct tape to expedite the process).
10. Attach tent loops to each of the four corners by spraying one side of the tyvek strip with spray adhesive and attaching it to the bottom of the tent. Do the same for the top and let dry. Attach another tent loop to the center mark on the back of the tent.
11. Secure the tent loops with stakes or if indoors use some kind of weight. Then place the tent pole inside at the center of the tent and secure the top at your front center mark with the clamp from the outside.
12. Use the spray adhesive to bond the bottom front flap of the doorway to each corner flap. You can use some tape here if needed. Let dry.
13. Remove the clamp but leave the tent pole in position and use spray adhesive and some tape to secure about 3 inches of the top doorway section together. Make sure it overlaps by at least 2 inches. Let dry.
14. Using spray adhesive secure the last tent loop to the very top on the outside of the tent where the tent pole sits. One strip of the tent loop should face the front and the other should face the back. Let dry.
15. Please the 1” section of “loop” velcro in the middle of the inside of the tent. This will help secure the tent pole in place.
Tent Door:
1. Take the two flaps you cut off the sheet and face the long ends together.
2. Overlap the ends by at least 2 inches and bond with spray adhesive.
3. Measure and mark 41” wide and 46” lengthwise and cut the excess off. It maybe necessary to measure the doorway to ensure that this door will overlap about 3” on each side.
4. Spray the adhesive on the left side of the tent opening and secure the door. Leave at least 3” overlapping. Apply some tape to the bottom and top sections on the inside and outside for additional reinforcement.
5. Take the velcro and cut one 40” section. Apply the “hook” section to the all the way along right side of the doorway about 1“ from the edge. Take the “loops” or fuzzy section and place it on the hook side then press the tent door flap against it to adhere. Make sure it’s completely bonded then open the doorway.
6. Cut 30” of velcro and attach the hook section to the bottom of the door way. Attach the loops section the same way described in the previous step.
7. Open the door and roll it on itself towards the left. Cut 3” of velcro and secure it to the tent and the door. The will allow for the tent door to be left open and secured with the velcro if desired.
Finishing touches:
1. Apply tape and additional adhesive where needed. Start with the interior to ensure that the seals are bonded securely. Make sure to reinforce the top area where the tent pole will rest.
2. Cut a 4’ section of paracord to secure the tent when it is bundled up, this will also be used if the top tent loop is preferred instead of the pole.
3. Print and spray with our template stencil!
Notes and considerations:
– Since this tent requires stakes, modifications with weights should be considered especially in urban environments. For example, you could use a backpack and heavy gear to secure the tent corners from the inside and use the pole to pitch on a hard surface like concrete as well.
– You may want to consider placing an additional tent loop in the middle of the back section so that the interior space can be slightly increased.
– While these tents are permeable make sure that the front door is not air tight! Modifications can be made for air flaps very easily using scraps and pieces of chiffon cloth or some kind of screen. Our recommendation is to cut two slits about 4 inches length on each side of the tent then adhere a flap over it with the opening facing down so rain or snow can’t enter the tent. A screen can be glued or taped from the inside to ensure bugs stay out too.
– Tyvek is NOT FIREPROOF.
– Tyvek is VERY LOUD when it is new. Some people recommend washing the material or crumpling it so it becomes less rigid and quite. This also helps it pack much smaller.
– Since tyvek is white it stands out and may not be preferable for some unsheltered folx, we recommend supplying a camouflage tarp to use as a fly or additional cover. This will help insulate and improve the weather resistance of the overall shelter.
If you come up with other mods and ideas email us. You can also paypal funds to support projects like these at: indigenousaction@gmail.com
Unsheltered rights to sleep:
No one was homeless on this land before 1492. That sleep is criminalized is an ongoing act of colonial violence. The colonizer’s laws have established that it is unconstitutional to enforce rules that stop homeless people from camping in public places when they have no place else to go. (Martin v City of Boise). There are no guarantees that cops won’t harass unsheltered relatives (for trespassing etc). Organizing community defense for encampments may be necessary in some areas. Please print & secure this notice to the tent or stencil it on the outside. Contact the ACLU or NLG if you face any harassment or violations: www.aclu.org – 212-549-2500, www.nlg.org – (212) 679-5100
NOTICE!
NOTICE TO LAW ENFORCEMENT & OTHER PUBLIC OFFICIALS
DO NOT DISTURB OR REMOVE THIS SHELTER!
THE OCCUPANT(S) OF THIS TENT ARE PROTECTED BY THE US CONSTITUTION.
It is unconstitutional to enforce rules that stop homeless people from camping in public places when they have no place else to go. (Martin v City of Boise)
#sleepisnotacrime